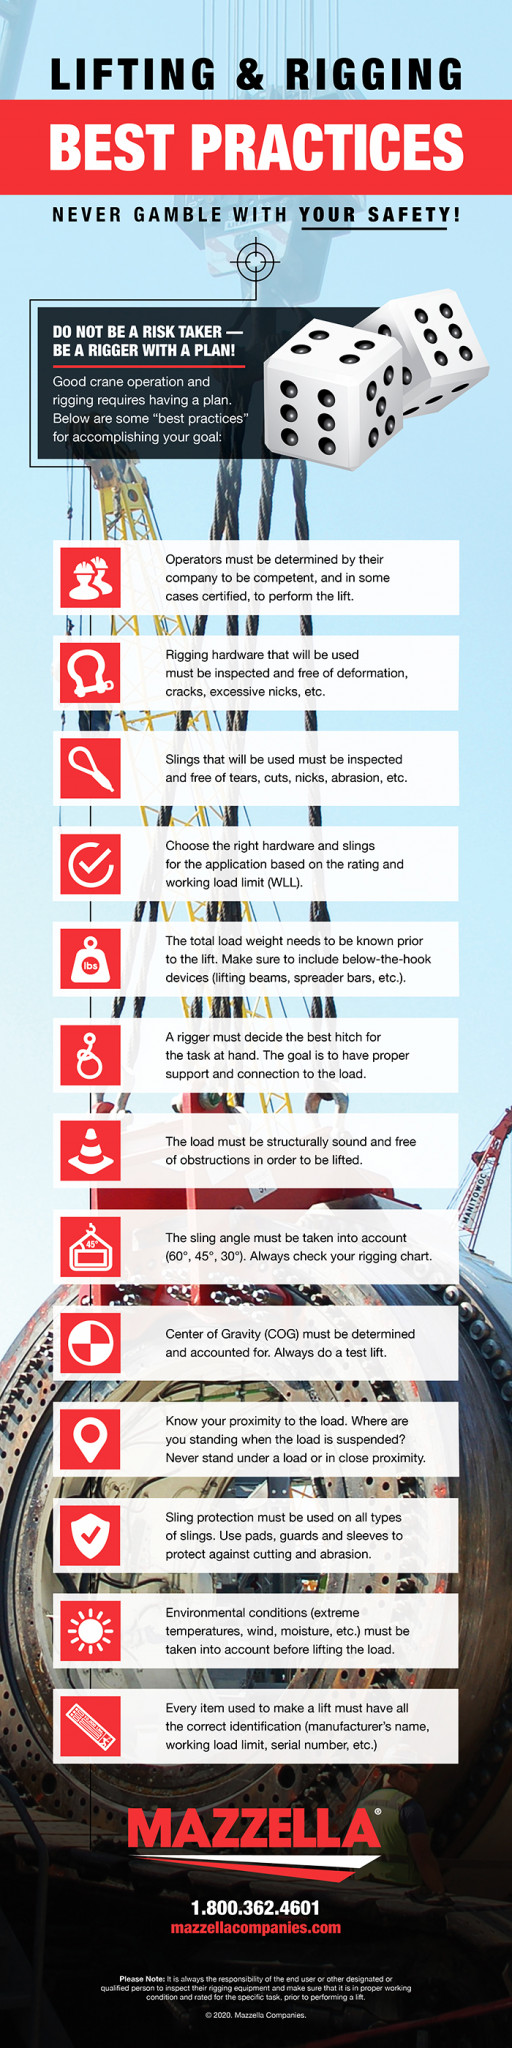
13 Rigging Best Practices for Your Next Overhead Lift [Infographic]
Don't take risks...be a rigger with a plan. Good crane operation and good rigging practices require having a plan and executing that plan for every lift. Practice good risk management by identifying, addressing, and controlling any risks that may exist prior to, during, or after an overhead lift.
Don’t take risks…be a rigger with a plan. Good crane operation and rigging best practices require having a plan and executing that plan for every lift. Practice good risk management by identifying, addressing, and controlling risks that may exist prior to, during, or after an overhead lift.
Keep reading for more information about lifting and rigging best practices to help develop a lifting plan. You can download our Lifting & Rigging Best Practices infographic, or download it in an 11×17 poster format to hang in your facility or use as part of a tool box talk
Proper Rigging Best Practices When Performing an Overhead Lift
>> Click Here to Download Infographic or 11X17 Poster! <<
Let’s Review
1. Determine Who is Qualified, Competent, Designated, or Certified
Who is responsible (Competent) for the rigging of the load? Who from your team has been authorized to remove a bad sling or piece of hardware from service? Who can then inspect that piece of rigging equipment and is Qualified to make the ultimate decision on if it can be put back into service or should be disposed of to prevent further use? Who is Certified to operate crane equipment on the job site?
Ultimately, the onus is on the employer to determine which of their workers are Qualified, Competent, Designated, or Certified to perform the task at hand.
2. Inspect Your Rigging Hardware
Rigging hardware that will be used, must be inspected and free of deformation, cracks, stretch, excessive nicks or gouges, etc.
If you’re unfamiliar with best practices, inspection, and removal from service criteria for detachable rigging hardware, then you should purchase ASME B30.26 – Rigging Hardware. This standard covers:
- Shackles
- Adjustable Hardware (turnbuckles, eye nuts, swivel hoist rings)
- Compression Hardware (wire rope clips, wedge sockets)
- Links, Rings, and Swivels
- Rigging Blocks
3. Inspect Your Lifting Slings
In the lifting and rigging industries, ASME B30.9 is one of the most commonly-referenced standards that applies to the fabrication, attachment, use, inspection, testing, and maintenance of slings used for load-handling purposes. The variety of different lifting slings that this standard applies to are:
- Wire rope slings
- Alloy chain slings
- Synthetic rope slings
- Metal mesh slings
- Synthetic web slings
- Synthetic roundslings
Prior to each use, all types of lifting slings need to be inspected for damage or irregularities to help avoid costly downtime and help to keep everybody on the job site safe. Routine inspection should be looked at as an investment that, over time, will help keep valuable equipment running and keep workers safe.
4. Select Rigging Gear Based on the Rating and Working Load Limit (WLL)
Working Load Limit (WLL) is the maximum mass or force which the product is authorized to support in a particular service. When determining the WLL needed, all components, including shackles, turnbuckles and hook must be made from the same strength materials with equal WLL ratings. The WLL is only as good as its weakest, or lowest WLL components—which is why it’s essential to ensure that all components in a particular configuration match the duty required for the job.
5. Determine the Total Load Weight Prior to the Lift
The total weight of the load needs to be known prior to the lift. Make sure to include the known weight of the load—plus, all slings, hardware, and below-the-hook devices like lifting beams, spreader bars, c-hooks, magnets, etc.
6. Determine the Proper Sling Type and Sling Hitch
A rigger must decide the best sling type and best sling hitch type to use for the task at hand. The goal is to have proper support and connection to the load.
Vertical Hitch – One end of the sling is attached to the hook, while the other end is attached directly to the load. When a sling is used in a vertical hitch, the full lifting capacity of the sling material can be utilized.
- In most cases, use more than one sling. A single sling can rotate or introduce twist into the sling
- Do not use for lifting loose materials, long materials, or unbalanced loads that can tip
Choker Hitch – The sling passes through one end around the load, while the other end is placed on the hook. Or, you can add a block of wood between the hitch and the load to improve grip and angle of the choke.
- Do not use on loose bundles
- Use slings that are long enough so the choke is effective and on the sling—not on the eye or any fittings
Double-Wrap Choker Hitch – Full 360° contact around the load can be achieved using a double wrap choker hitch. This hitch compresses the load and can help prevent it from slipping out of the sling.
- Do not overlap slings at the bottom of the load
Basket Hitch – The sling cradles the load while both eyes are attached overhead. More than one sling may be necessary to help ensure load control.
- Do not use basket hitches with loads that are difficult to balance
7. Determine that the Load is Structurally Sound and Free of Obstructions
Make sure that the load is secure and properly supported. Check the area surrounding the load to make sure it won’t get snagged or caught on any nearby obstructions when being lifted, moved, or lowered. Perform a Job Site Analysis (JSA) to identify any potential hazards. After a hazard is identified, a determination should be made on how to control or eliminate the hazard altogether.
8. Determine the Proper Sling Angle
The sling angle must be taken into account when determining the proper sling and angles used to make an overhead lift (90°, 60°, 45°, 30°). The smaller the angle, the less load a sling can carry. Always check your rigging chart to understand the capacity of the sling you’re using at any given angle.
9. Find the Load’s Center of Gravity (COG)
The Center of Gravity (COG) is the point at which the load is balanced—where the horizontal and vertical balance points intersect. The Center of Gravity should be directly below the load hook and the connection to the load right above center of gravity.
10. Know Your Proximity to the Load
Where will you and your co-workers be standing when the load is up in the air? Never stand under a load or in close proximity to a load when it is being lifted, moved, or lowered.
When moving a suspended load:
- Keep the load as low as possible
- Keep only essential employees near the load
- Ensure everyone is accounted for and in line of sight or radio contact when a lift is made
- Ensure everyone is accounted for after the lift is complete
11. Use Sling Protection on All Types of Slings
Slings must be protected from cutting or damage. Failure of any sling from cutting or abrasion is preventable. Use corner pads, guards, and sleeves to protect against cutting and abrasion for all types of lifting slings. ALL slings must be protected from corners, protrusions, rough surfaces, and in some cases—where used with hardware.
Best practice is to add protection on all edges on the load—including those that are not the primary load-bearing areas.
12. Account for Environmental Conditions
Are there any unusual loading or environmental conditions? These conditions should be accounted for when putting your lift plan together:
- Extreme temperatures
- Wind
- Moisture/snow/ice
- Chemically-active environments
- Changes in elevation
13. Check All Rigging Gear Has the Proper Identification and/or Markings
Every item used to make a lift must have all of the correct identification (manufacturer’s name, working load limit, serial number, etc.)
Missing sling tags or missing markings/identification on rigging products is one of the most common problems our rigging inspection group finds when they’re out in the field.
Please Note: It is always the responsibility of the end user or other designated or qualified person to inspect their rigging equipment and make sure that it is in proper working condition and rated for the specific task, prior to performing a lift.
At Mazzella, we sell all kinds of lifting and rigging equipment—including:
- Overhead cranes
- Below-the-hook lifting devices
- Lifting slings
- Rigging hardware
We also offer lifting and rigging training and we have a team of certified rigging inspectors who can come onsite the perform an annual rigging inspection and provide you with required documentation for your records.
If you have any questions about rigging equipment, products for your lifting application, inspection of your rigging gear, or rigging best practices, contact one of our Lifting Specialists today!


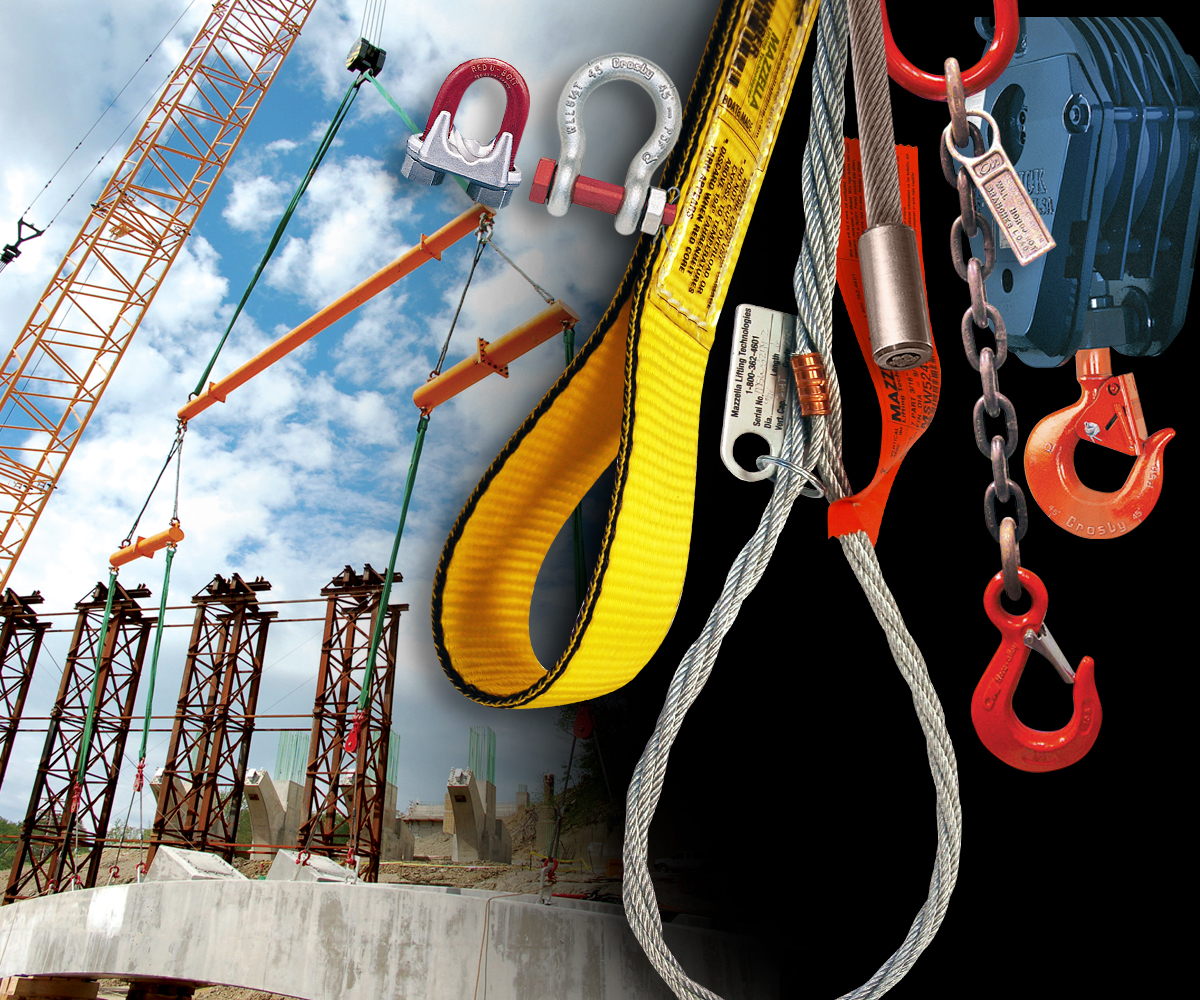
Lifting & Rigging Products
Are you looking for lifting and rigging products that you can trust for your next project? We partner with the largest manufacturers in the world to stock and provide you with the products you need to make your next lift, including all types of lifting slings, rigging hardware products, wire rope, hoists, hoist parts, pullers, and other related distributed products.
Contact us today to get the lifting and rigging products you need!
Learn more about our selection of lifting and rigging products!
Copyright 2018. Mazzella Companies