How to Install Wire Rope Clips: Full Guide
Knowing how to install wire rope clips correctly is critical to ensuring safety and preventing property damage or injury. In this step-by-step video guide, Terry Driscoll walks you through the proper installation of U-bolt wire rope clips, covering everything from spacing and torque specs to application types and safety best practices.
You’ll learn how to install wire rope clips properly, how to avoid common mistakes like saddling the dead horse, and how to ensure your clips are torqued to manufacturer specifications. Whether you’re dealing with a critical application or a basic anchoring job, getting it right the first time matters.
What You’ll Learn:
- Why incorrect installation of wire rope clips is dangerous
- When to use forged vs. malleable clips
- The difference between U-bolt and fist grip clips
- The meaning of “never saddle a dead horse”
- How to install wire rope clips step-by-step
- How to determine turnback length, number of clips, and torque specs
- Why using a calibrated torque wrench is essential
- The importance of retorquing clips after load application
Who This Video is For:
- Riggers and rigging inspectors
- Safety and EHS managers
- Construction site managers
- Industrial maintenance personnel
- Anyone working with wire rope assemblies
New to rigging or a seasoned pro, this guide will help you avoid costly installation errors and work safer every day. If you’re wondering how to install wire rope clips the right way, this video will walk you through every critical step.
Need Wire Rope Clips?
We stock and distribute a full line of Crosby® wire rope clips for all diameters of wire rope. Shop wire rope clips and other rigging hardware and slings here!
Transcript
Why Proper Wire Rope Clip Installation Matters
– Terry, what happens if someone installs a wire rope clip incorrectly?
– You could have damage to property, you could have injury to self or to other people. How do you like lawsuits?
– And that’s why today, we are going to show you how to properly install a wire rope clip step by step.
My name is Ben, and this is the Lifting & Rigging Channel®. I’m here with Terry Driscoll, Mazzella Regional Sales Manager and AWRF board member. And today, we’re going to show you how to properly install wire rope clips.
Now Terry, you’ve seen firsthand what happens when someone installs a wire rope clip incorrectly.
– So people might not understand the proper way to install a drop forged clip, or it was passed down from generational knowledge. But if it’s not installed properly, you could have of course damage to property, you can have injuries to self or to other people around you. So making sure that it’s installed properly is paramount.
Forged vs. Malleable Wire Rope Clips
– So there’s a couple different kinds of wire rope clips. There’s forged and then there’s malleable. What’s the difference between those two?
– Drop forged of course, is more prominently utilized when it comes to any type of tensioning type systems or pulling.
If you’re talking about a malleable clip, now of course, that is something that you would want to utilize for maybe like handrails or guardrails or something of that sort, something that’s not going to see a lot of stress. And the reason is the metal that it’s made from tends to be a little bit more brittle. It’s not going to hold up compared to like a drop forged clip.
– So how do you know when you should use one or the other?
– Well, when in doubt, I would go with a drop forged clip.
– So basically like a malleable is more for maybe around the house or a home or–
– Throwaway type application–
– Yeah.
– If someone is suspending maybe some lights in a grocery store or something of that sort.
– Okay, but if it’s a critical application–
– Drop forged clip would be the best.
U-Bolt vs. Fist Grip Wire Rope Clips
– Now you got two different kinds of forged clips. So can you tell me about this one versus this one here?
– So you do have the traditional U-bolt or the drop forged clip, and then of course, the fist grip clip. You’ll notice that on the fist grip clip, we happen to have two different saddles on it compared to one specific saddle.
Really, a lot of it tends to be preference than anything else. You do have a wider variety of drop forged clips, where we can go upwards of three and a half inch diameter, compared to stopping at one and a half inches on the fist grip style clips. These will also probably tend to be a little bit more expensive, but I’m not going to say that it makes it foolproof, but it’s a lot easier on the install without any type of second-guessing.
What “Never Saddle a Dead Horse” Means for Wire Rope Clips
– What do you mean by foolproof?
– You may have heard the old adage, never saddle a dead horse.
– Yes.
– So when someone is taking wire rope, and they’re turning it back on itself to form an eye, they may have a tendency to put the saddle of the drop forged clip onto that dead end or the short portion of that wire rope. And if that happens, now, of course, we’re going to be causing some damage to the actual live line with that U-bolt as it’s being torqued onto that rope, and you could have a possible premature failure.
Parts of a Wire Rope Clip Explained
– So I guess real quick, we probably should talk about then what are the pieces and parts to this wire rope clip? So I’ve always heard the term, never saddle a dead horse. And you look at this, and you go, well, is this the saddle or is this the saddle? So I think that’s probably where a lot of the mistakes come in.
– You’re correct, sir. So, of course, we’ve got our red U-bolt here, our nuts that we have, and of course, the saddle. This is the saddle. This is where a lot of the question marks come into play.
– You have a double saddle clip or a fist grip. It’s basically just two saddles, right? So you don’t have to worry about which end this is going to go on.
– That is correct.
– Can you use this for any application that you would use a U-bolt style clip?
– Yes, you can. There might be some, again, limitations with the size, since this stops at one and a half inches, but they’re interchangeable.
How to Install U-Bolt Wire Rope Clips (Step-by-Step)
– Today, we’re going to show you how to install the U-bolt style clips.
All right, Terry, you’re going to walk us through the step-by-step process of how to install U-bolt style wire rope clips. So why don’t we start again with the never saddle a dead horse. What’s the dead horse?
– The dead horse, well, as soon as we start turning back the wire rope, you’ll notice that we have this dead end here. Of course, right below it, we have the live line that’s going the length of that assembly that we’re about to make. So the dead end would be this short little section up on the top where we’re going to be turning it back.
– So to be clear, the U goes on the dead end, the saddle goes on the live end.
– Correct. And if you take a look at the saddle itself, we have these nice grooves to it. So we’re not trying to destroy the wire rope itself, but we do want to have a sort of a crushing effect on the top as soon as we start torquing down the U-bolt portion of it so that it will help bind everything in place and keep it in position.
– Okay, so why don’t you just walk us through, and if I have any questions, I’ll just ask you while you’re going through it.
How Much Turnback Does Your Wire Rope Clip Assembly Need?
– So we have a 9/16 6×36 IWRC, independent wire rope core. We are starting our turn back, as you can see, right at the base here, we have about a base length. We have 12 inches minimum, which is required for our turnback.
– So how do you know that? How do you know what the minimum turnback length is supposed to be?
– Well, I’m going to give you a little bit of a shameless plug here for a key vendor of Mazzella, happens to be The Crosby Group. They are, I believe, the one and only manufacturer that is actually publishing all of that proper information on every single one of their clips that they sell.
And if you take a look at that bag there, if you wouldn’t mind holding it up, notice all kinds of pertinent information on it that is explaining the do’s and don’ts of drop forged clips and fist grip clips. So every single one of their clips is bagged and tagged with all of this pertinent information on it.
Right now, what you want to do is just get things hand-tight, ’cause you want to start at the very end first. And once we get that towards the end, then of course we’re going to be moving closer to the front, where we would be positioning a thimble eye.
Do You Need a Thimble for Wire Rope?
So here we have a heavy duty thimble, dropping in our heavy duty thimble into this. And if you wouldn’t mind opening up another one of those bags, sir.
– So what’s the purpose of the thimble? Do you have to have a thimble?
– You don’t have to have a thimble. I would recommend the thimble. And the reason is it’s going to help protect that wire rope for any type of additional abrasion that you might be receiving. Metal on metal abrasion.
U-bolt.
– U-bolt.
– Now we need our nuts.
– Here’s a nut.
How Close Should the Wire Rope Clip Be to the Thimble?
Then how do you know how close you’re supposed to get this clip to your thimble?
– So the second clip that we’re installing is going to be as close to the base as possible.
How Many Wire Rope Clips Do You Need for an Assembly?
Now start tightening it down by hand. And now, of course, for our last clip that we’ll have, we’re going to make sure it’s evenly spaced in between the two that we already have in place. So we can open up another bag.
– So how do you know how many clips you need?
– Once again, all of this information is going to be found from the manufacturer itself or on the back of any of these bagged and tagged clips that we’re getting from The Crosby Group. Or you can check OSHA 1926.251 for that information.
U-bolt. Make sure we’re evenly spaced.
How to Properly Torque Wire Rope Clips to Manufacturer Specs
Now Ben, I’m going to ask you a question.
– Yeah.
– You strong enough and feel good enough by the fact that you hand tightened these last couple of bolts?
– To put my life into this holding me?
– Correct.
– Absolutely not.
– Absolutely not. Well, that’s why we still have an additional step that we have to perform, and that is torquing each and every single one of these nuts down to the specifications required by the manufacturer.
– Now I’m going to ask you, and I’m going to take a guess at where you can find this information. How do you know how tight it should be, how much to torque it to?
– And well, if you take a look at the nice little bags that you were just busy opening up, you’re going to see that we have a 9/16. It told us the 12 inches of the turnback, and it’s also telling us 95 foot-pounds per nut that we have.
– Okay, now how do you know if you’re torquing it down to 95 foot-pounds?
– Well, that’s why we actually have a calibrated torque wrench. So we’re going to be alternating between the two different nuts that are on the drop forged clip, easing in on one, easing in on the other. And we’re trying to close everything down nice and even.
So we would actually lock it into 95 foot-pounds here. And then of course, once you hit that portion of it, it’s actually going to either, one, stop or it’s going to start clicking a little bit different than what it was.
– So if I just got a regular old socket wrench, a drill, or something, and then torqued these down tight, don’t use that, right?
– You can utilize to get down to what you believe is the rated foot-pounds. But unless you have this, you don’t know. So you’re putting yourself at risk.
– Right.
– I would recommend against it.
Why Retorquing Wire Rope Clips After Load Application Is Critical
– And once we get it torqued down, then we’re done, right? We wash our hands and we walk away from it.
– Well then, of course, we’re going to apply a load to it. We’re going to make sure everything’s seated properly, and then we’re coming back in with round two of our torque wrench.
– So it’s an important second step, often skipped second step, I’m guessing.
– Yes sir.
– You’re not done yet. You have to put a load and test it and then torque it again.
– Once you apply a load, it’s actually going to seat, and at the same time may take out some of that constructional stretch. So you have to make sure everything is retorqued a second time.
Can You Use Too Many Wire Rope Clips?
– Now a couple other questions while you’re doing this, Terry. Is there such thing as too many clips? Can you put on like, that you’re like, “I don’t know how many clips I’m supposed to use. I’ll put five.”
– It depends on how long your tail is, but there is. Really don’t overcomplicate the assembly. If you’re thinking that more clips are going to keep everything into place better, you may actually damage the wire rope a little bit more.
What a Properly Torqued Wire Rope Clip Assembly Should Look Like
As you can see, I mean you probably notice there’s a little bit of a difference now to this assembly from where we started.
– You got kind of a bump between the rope here. It’s supposed to look like that?
– It’s exactly what it’s supposed to look like. We want to see deformation in that rope on that top dead end. The clip itself when we were looking at the saddle, notice that it had the grooves in it to accommodate that wire rope body from just resting into it. So we are protecting that base layer, which is part of that live line.
We want to see the crushing effect up through here, which is going to indicate number one, that it’s seated properly, but also that these clips are going to do what their intended purpose is, and that’s to hold that load.
When I go out in the field and see a perfectly straight assembly that has drop forged clips on it, that is a huge indication that they probably did not torque these down properly.
Why You Should Not Alternate Wire Rope Clip Direction
Some people think that you shouldn’t see that arch, so what they might do instead is alternate the clips.
– Why don’t you alternate the clips?
– Well, right now, as it stands, this is actually rated at about 80% of the break strength of the wire rope. And that depends on what size drop forged clip you’re using.
So if we’re looking at anywhere from up to 7/8 diameter, that’s still going to be 80% of the breaking strength of the wire rope. If we start going above that one inch and above, then you’re looking at 90% of the efficiency of these particular clips.
But alternating it like that, and from years past, we have actually shown customers that were doing it on river docks, they just thought it was going to make it stronger by switching it up. You could see how awkward it is now with the bends that we have in that particular setup.
– And I can see a lot of people going, “I don’t remember which part, do you saddle the dead horse or you don’t saddle the dead horse. I’ll just–“
– “Alternate it and just get it over with,” right? They were having premature failures, couldn’t understand what was going on. They were weakening their rope. That’s a big no-no.
Final Retorque Step and Safety Recap
– So what’s the next step?
– We’re going to apply a load, pretty much working load of what the 9/16 wire rope would be and then we’re going to retorque those clips again.
– If you ever need to figure out how to properly install a clip, refer back to this. An improper installation can put your equipment and your lives at risk.
If you need wire rope clips, you can shop for them at mazzellacompanies.com or contact us below for any of your lifting needs.
If you found this video useful, informative, entertaining, or you just feel like being friendly, then hit that like button so we can get this information out to everyone who needs it. Subscribe and hit the bell so you never miss a video. Remember, safe rigging is smart rigging. My name is Ben, stay safe out there.
I love doing stuff like this on camera, because I definitely don’t get trolled about how terrible I am at it afterwards.
– So whoever thought 9/16 was a good idea…
FREE Downloads
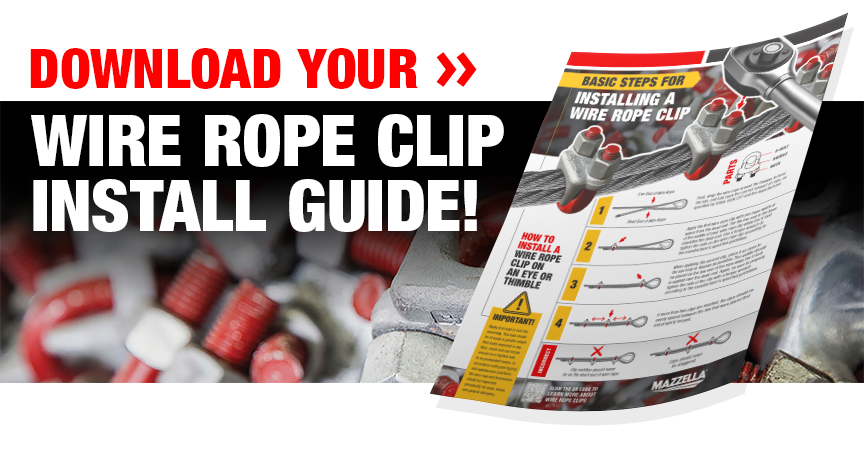
- Wire Rope Clip Installation Guide [Infographic]
- Lifting and Rigging Best Practices Infographic
- Rigging Gear Inspection Field Reference [Guide]
- Lifting and Rigging Site Assessment Guide
Learn More! Articles & Videos
- How to Properly Install U-Bolt Wire Rope Clips
- Wire Rope Clips: Different Types, Installation, and Common Mistakes
- Wire Rope End Terminations: Sockets, Wire Rope Clips, and Splices
- Wire Rope Inspection and Removal from Service Criteria
- Instructions and Warnings on the Use Of Steel Wire Rope
- A Dictionary of Rigging Terms
Shop or Contact Mazzella
- Shop Now! Mazzella Online Rigging Shop
- Schedule Remote or In-Person Rigging Training
- Contact Mazzella’s Lifting and Rigging Division
In this video
0:00 – Why Proper Wire Rope Clip Installation Matters
1:00 – Forged vs. Malleable Wire Rope Clips
1:53 – U-Bolt vs. Fist Grip Wire Rope Clips
2:38 – What “Never Saddle a Dead Horse” Means for Wire Rope Clips
3:12 – Parts of a Wire Rope Clip Explained
4:04 – How to Install U-Bolt Wire Rope Clips (Step-by-Step)
5:23 – How Much Turnback Does Your Wire Rope Clip Assembly Need?
6:19 – Do You Need a Thimble for Wire Rope?
6:51 – How Close Should the Wire Rope Clip Be to the Thimble?
7:16 – How Many Wire Rope Clips Do You Need for an Assembly?
7:56 – How to Properly Torque Wire Rope Clips to Manufacturer Specs
9:30 – Why Retorquing Wire Rope Clips After Load Application Is Critical
10:11 – Can You Use Too Many Wire Rope Clips?
11:04 – What a Properly Torqued Wire Rope Clip Assembly Should Look Like
11:53 – Why You Should Not Alternate Wire Rope Clip Direction
12:55 – Final Retorque Step and Safety Recap
Disclaimer:
Any advice, graphics, images, and/or information contained herein are presented for general educational and information purposes and to increase overall safety awareness. It is not intended to be legal, medical, or other expert advice or services, and should not be used in place of consultation with appropriate industry professionals. The information herein should not be considered exhaustive and the user should seek the advice of appropriate professionals.